Fun without Servers, Part 1
Patrick Rodriguez | Posted on Thu 16 February 2017 in programming
Secure 'Serverless' File Uploads with AWS Lambda, S3, and Zappa

As I've been experimenting with AWS Lambda, I've found the need to accept file uploads from the browser in order to kick off asynchronous Lambda functions. For example, allowing a user to directly upload in an S3 bucket from the browser, which would trigger a Lambda function for image processing.
I decided to use the Zappa framework, as it allows me to leverage my existing Python WSGI experience, while also providing a number of awesome features such as:
- Access to powerful, prebuilt Python packages such as Numpy and scikit-learn
- Automatic Let's Encrypt SSL registration and renewal
- Automatic scheduled job to keep the Lambda function warm
- Ability to invoke arbitrary Python functions within the Lambda execution environment (great for debugging)
- Deploy bundles larger than 50 megs through a Slim Handler mechanism
This walkthrough will cover deploying an SSL-encrypted S3 signature microservice and integrating it with the browser-based Fine Uploader component. In an upcoming post, I will show how to take the file uploads and process them with an additional Lambda function triggered by new files in an S3 bucket.
Deploy Zappa Lambda Function for Signing S3 Requests
Here are the steps I took to create a secure file upload system in the cloud:
- Sign up for a domain using Namecheap
- Follow these instructions to create a Route 53 Hosted Zone, update your domain DNS, and generate a Let's Encrypt account.key
- Create S3 bucket to hold uploaded files, with the policy below. Note: do not use periods in the bucket name if you want to be able to use SSL, as explained here
{
    "Version": "2008-10-17",
    "Id": "policy",
    "Statement": [
        {
            "Sid": "allow-public-put",
            "Effect": "Allow",
            "Principal": {
                "AWS": "*"
            },
            "Action": "s3:PutObject",
            "Resource": "arn:aws:s3:::BUCKET_NAME_HERE/*"
        }
    ]
}- Activate CORS for the S3 bucket. You may want to update the AllowedOrigin tag to limit the domains you are allowed to upload from.
        *
        POST
        PUT
        DELETE
        3000
        ETag
        *
- Optionally update the Lifecycle Rules for that bucket to automatically delete files after a certain period of time.
- Create a new IAM user specifically to create a new set of keys with limited permissions for your Lambda function:
{
    "Version": "2012-10-17",
    "Statement": [
        {
            "Sid": "Stmt1486786154000",
            "Effect": "Allow",
            "Action": [
                "s3:PutObject"
            ],
            "Resource": [
                "arn:aws:s3:::BUCKET_NAME_HERE/*"
            ]
        }
    ]
}- Clone this Zappa project:
git clone https://github.com/stratospark/zappa-s3-signature - Create a virtual environment for this project:
virtualenv myenv. Note, conda environments are currently unsupported, so I utilize a Docker container with a standard Python virtualenv - Install packages:
pip install -r requirements.txt. - Create an
s3-signature-config.jsonfile with the ACCESS_KEY and SECRET_KEY of the new User you created, for example:
{
    "ACCESS_KEY": "AKIAIHBBHGQSUN34COPA",
    "SECRET_KEY": "wJalrXUtnFEMI/K7MDENG+bPxRfiCYEXAMPLEKEY"
}- Upload
s3-signature-config.jsonto an S3 bucket accessible by the Lambda function, used in remote_env config field - Update the prod section of
zappa_settings.jsonwith your aws_region, s3_bucket, cors/allowed_origin, remote_env, domain, and lets_encrypt_key - Deploy to AWS Lambda:
zappa deploy prod - Enable SSL through Let's Encrypt:
zappa certify prod
Deploy HTML5/Javascript Fine Uploader Page
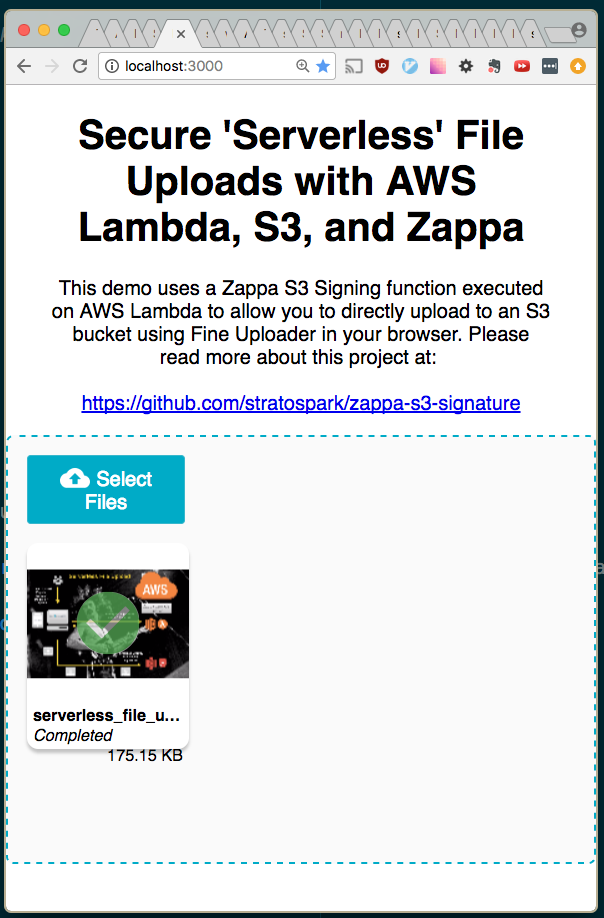
The following steps will allow you to host a static page that contains the Fine Uploader component. This is a very full-featured open-source component that has excellent S3 support. It also comes with pre-built UI components such as an Image Gallery, to help save time when developing prototypes.
We have deployed the AWS V4 Signature Lambda function in the previous section in order to take advantage of direct Browser -> S3 uploads.
You can deploy the HTML and Javascript files onto any server you have access to. However, as we have an opportunity to piggyback on existing AWS infrastructure, including SSL, we can just deploy a static site on S3.
- Clone the sample React Fine Uploader project: https://github.com/stratospark/react-fineuploader-s3-demo
- Update the request/endpoint, request/accessKey, and signature/endpoint fields in the FineUploaderS3 constructor in App.js. Optionally update objectProperties/region.
- For example, request/endpoint should be:
https://BUCKET_NAME.s3.amazonaws.com... Note: the endpoints must not have trailing slashes or the signatures will not be valid!
- For example, request/endpoint should be:
- Run:
npm build. Note: you need to add ahomepagefield topackage.jsonif you will serve the pages at a location other than the root. - Create S3 bucket and upload the contents of the build folder. Note: once again, do not use periods in the name if you want to use HTTPS/SSL
- Make this S3 bucket a publically available static site. Also remember to set a policy like below:
{
    "Version": "2008-10-17",
    "Statement": [
        {
            "Sid": "PublicReadForGetBucketObjects",
            "Effect": "Allow",
            "Principal": {
                "AWS": "*"
            },
            "Action": "s3:GetObject",
            "Resource": "arn:aws:s3:::BUCKET_NAME/*"
        }
    ]
}- Access the Fine Uploader demo page in your browser, for example: https://stratospark-serverless-uploader.s3.amazonaws.com/index.html
- Upload a file
- Check your public uploads bucket
That's all!
Stay tuned for the next installment, where we take these uploaded files and run them through image processing, computer vision, and deep learning Lambda pipelines!