Generating Synthetic Data for Image Segmentation with Unity and PyTorch/fastai
Patrick Rodriguez | Posted on Wed 20 February 2019 in programming

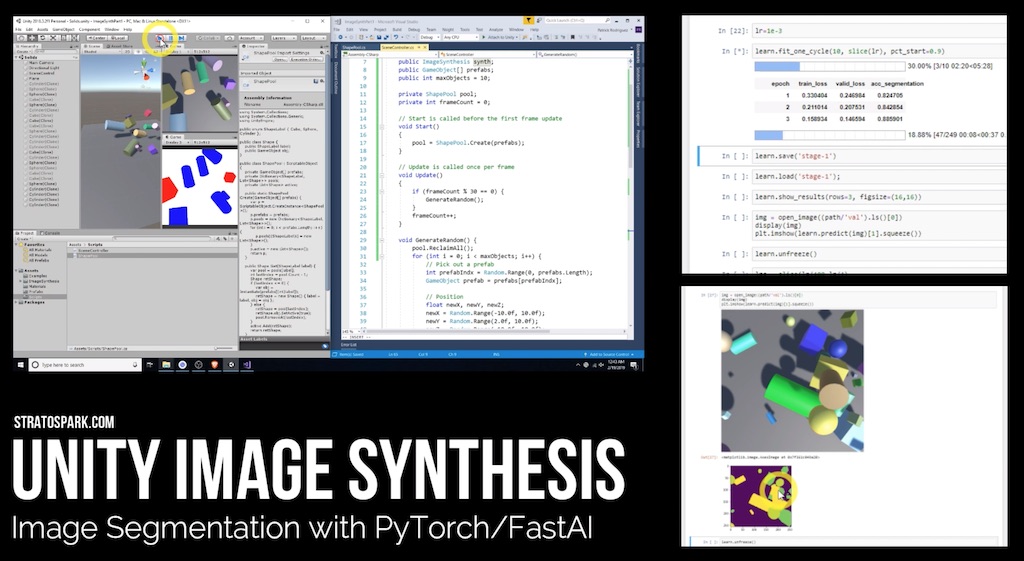
This article will help you get up to speed with generating synthetic training images in Unity. You don't need any experience with Unity, but experience with Python and the fastai library/course is recommended. By the end of the tutorial, you will have trained an image segmentation network that can recognize different 3d solids. Read on for more background, or jump straight to the video tutorial and GitHub repo.
Background
When training neural networks for computer vision tasks, you can’t get away from the need for high-quality labeled data… and lots of it. Sometimes, there is a freely available dataset that is up for the task. Other times, we are lucky enough to have other parts of an organization managing the data collection and labeling infrastructure. For those cases where you just can’t get enough labeled data, don’t despair! Research shows that we can obtain state of the art results with synthetic data (reducing or eliminating the need for actual training data).
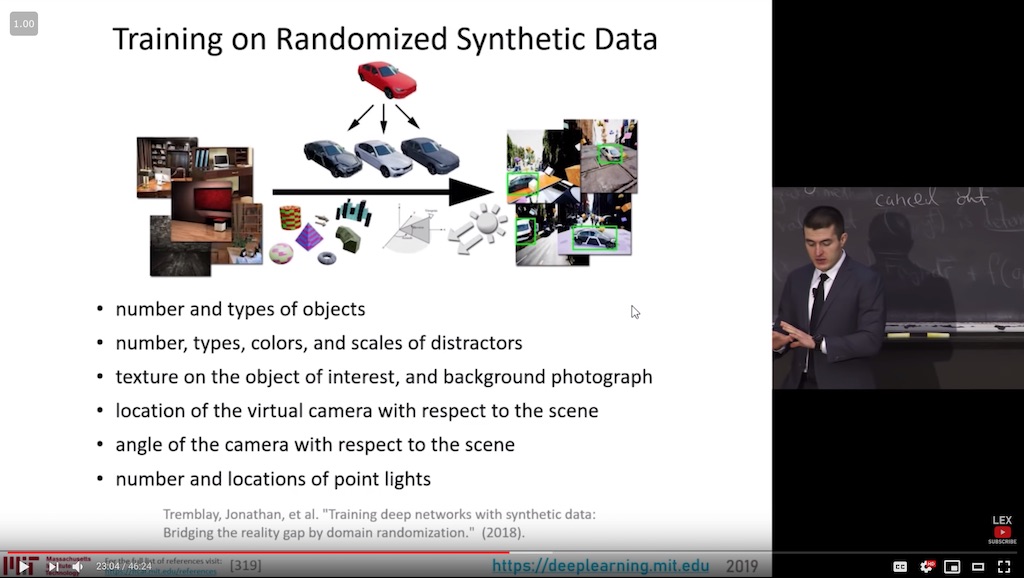
In this overview of Deep Learning advances of the past 2 years, Lex Fridman reserves a section for the topic of training with Synthetic Data, particularly domain randomization techniques:
Domain Randomization is like image augmentation on steroids, and then some. Given some base images or 3D models, we use a 3D graphics engine to generate many different versions of a scene: randomized colors, textures, positions, scales, rotations, morphs, lighting conditions, camera angles, etc. Since the engine is generating these scenes, it can simultaneously generate the appropriate labels, such as bounding boxes or segmentation masks.
Possible 3D engine choices include Unity, Unreal Engine, and Blender. Unity and Unreal are game engines, which power some of the most popular games out there. Games need to run in real-time (> 30FPS) and many strive for more and more realistic graphics each year. In other words, perfect for quickly generating many synthetic images for training purposes. It’s awesome that indie developers, researchers, and programmers of all stripes are able use the same tools as pro game developers, at no to low-cost. Blender is different in that it is an open-source 3D modeling and animation tool. Though it has some capabilities for real-time rendering, the main use case is for offline rendering, where a frame can take seconds, minutes, or even hours to render depending on scene complexity. What it lacks in speed, it makes up for in more realistic renderings and the ability to use Python as a scripting language.
I’m going to focus on Unity, only because I am most familiar with it. Coming from an applications and data engineering background, it can be daunting to dive into using a game engine. There are so many features and APIs in Unity, it’s easy to get overwhelmed. Remember that building modern games are a complex endeavor, encompassing many specialized fields such as 3D graphics, animations, physics, sound, networking, real-time performance optimizations, UI/UX design, level design, etc. Luckily, there is just a subset of functionality that we need to start generating synthetic data.
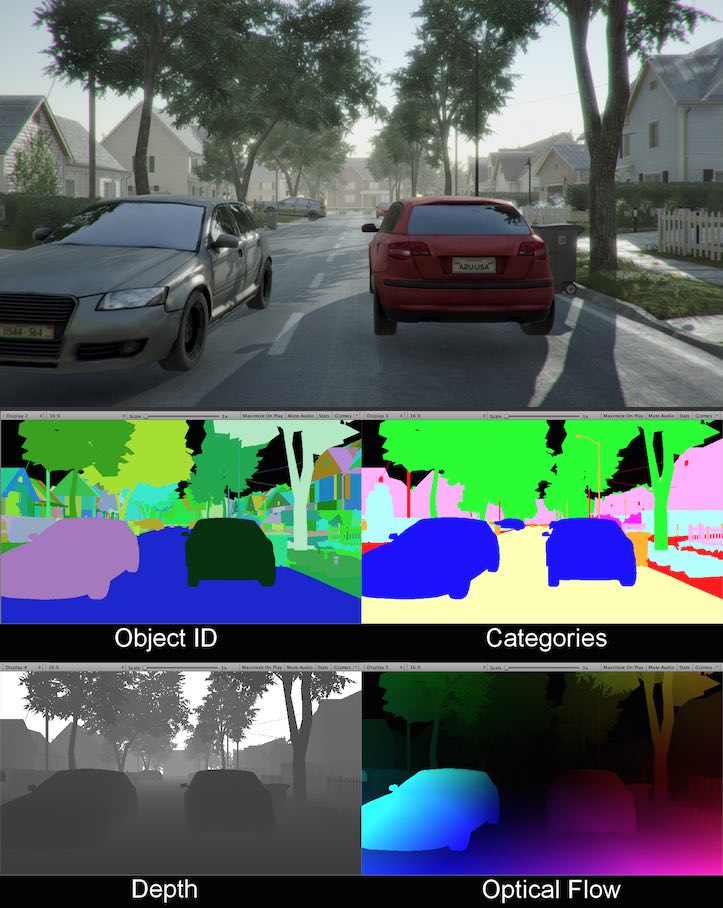
Unity provides an open-source package: Image Synthesis for Machine Learning. It’s the perfect base to start building synthetic image generators. Take a look at their sample screenshot of a simulated driving environment, and the different annotations that are automatically extracted. The included scripts can save each frame to disk, along with the multiple annotations per frame.

The project does not actually include the car simulator, and the actual example it does come with is not suitable for generating training data. I would like to provide a short tutorial showing how to both generate data for a toy problem and use that data to train an image segmentation neural network. In future posts, I hope to enhance our example with more domain randomization techniques and move from toy problems to more sophisticated ones.
Tutorial
A source of inspiration has been the course "Practical Deep Learning for Coders, v3” from fast.ai. For those who haven’t taken any of their courses, I highly recommend them for their hands-on, top-down approach to learning. You’ll learn how to use their incredible fastai library for PyTorch, allowing you to tackle a diverse set of complex tasks with the same well-designed API: image classification, object detection, image segmentation, regression, text classification, just to name a few.
In lesson 3 of their latest course, you learn how to train U-Net based segmentation network on the CamVid street scene dataset. The network will learn how to identify which pixels belong to which classes, including Road, Car, Pedestrian, Tree, etc.
The toy problem that I came up involves being able to segment an image to find geometric solids such as Cubes, Spheres, and Cylinders. These are simple 3D models that are actually built into Unity.
Requirements:
- Unity installed, preferrably version 2018.3.2
- Python environment with fastai and dependencies installed
The tutorial is mainly in video form due to the GUI driven editor of Unity. Also, many readers are coming from the machine learning world, so I'm assuming they have little to no experience using Unity and would appreciate a bit of hand-holding. Don't worry though, we quickly get into the actual task at hand after some preliminaries.
You can clone the repo and run the final project, or follow along with the video to recreate the project from scratch.
For convenience, the following is a list of some of the topics we'll cover in the video:
- Downloading the ML-ImageSynthesis code and exploring its functionality
- Basic components of the Unity Editor GUI and how to customize it
- Organizing a Unity project with appropriate folders
- Creating new Scenes
- Creating new GameObjects, specifically 3d solids like Cubes, Spheres, and Cylinders
- Manipulating objects in the Scene view, including positioning, rotating, and scaling with mouse and keyboard
- Using the Inspector pane to modify public properties of GameObject components
- The difference between Scene and Game views and how to adjust the Camera
- Creating user-defined Layers to act as object categories
- Creating and modifying Prefabs
- Creating a custom C# component script
- Exposing script variables to the Editor GUI
- Visually linking components to each other in the GUI
- Adding custom camera display resolutions
- Modifying object appearance with custom Materials
- Enabling the Physics Engine and how RigidBodies work
- The Start/Update methods of MonoBehavior subclasses
- Randomizing the position/rotation/scale/color of a GameObject through code
- Inspecting memory usage with the Profiler
- Creating an Object Pooling system to reuse objects and cap memory usage
- Modifying ImageSynthesis code to output only a specific annotation image
- Creating fields to specify # of training and validation images in the Editor
- Modifying the layer colors to conform to the grayscale RGB values the image segmentation network requires
- Using the fastai Datablock API to load data produced by our Unity simulation
Next Steps
There are a lot of ways we can go from here. For example, randomizing:
- Textures, instead of flat colors
- Lighting conditions, including multiple light sources, varying intensities, and colors
- HDR imagery to provide realistic backgrounds and lighting
- Camera angles and properties such as FOV
I'd like to extend our simulator to handle some of these properties in future posts. Not to mention, seeing how well a network trained on simulated images does on real world data!
Do you know of any datasets where you'd like try creating simulated images and apply domain randomizaiton?
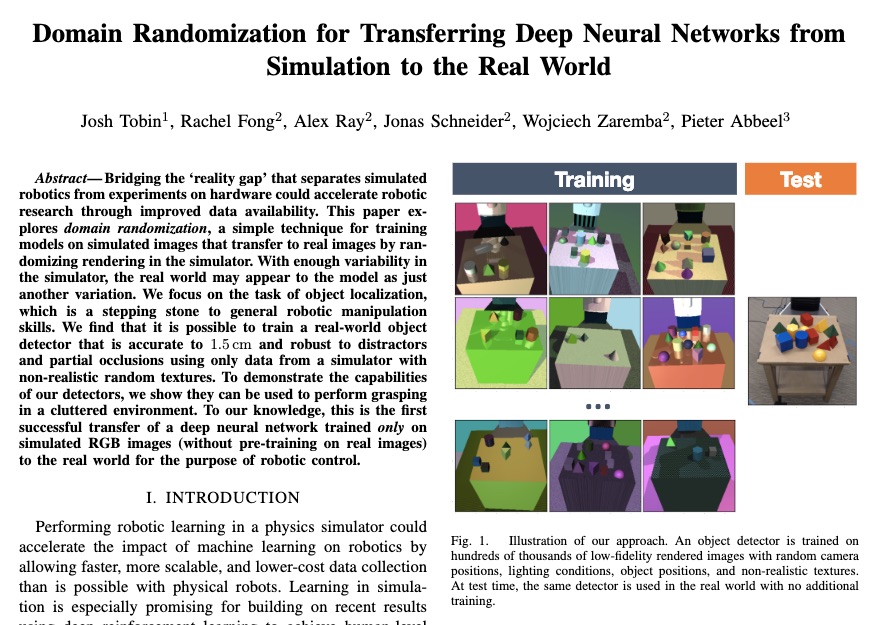
In the mean time, here is an early paper on the topic to help you dive deeper. Domain Randomization for Transferring Deep Neural Networks from Simulation to the Real World:

